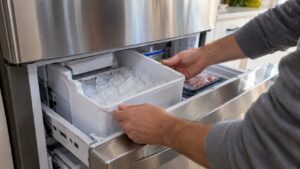

A freestanding Kenmore ice maker installation is a more compact project than a refrigerator or freezer install, but skipping any one of a few key steps is the most common reason these units leak, run noisily, or fail to produce ice properly right out of the box. Most standalone Kenmore ice makers on the market are Whirlpool-built, carrying a 106-prefix model number.
Choosing a Location
Freestanding ice makers need a stable, level surface, access to a nearby water supply line or a manual-fill reservoir depending on the model, a standard electrical outlet, and either a drain connection or convenient access for manual drain-tray emptying. Avoid placing the unit somewhere it will sit in direct sunlight or right next to a heat source such as an oven, both of which reduce ice production efficiency.
Connecting the Water Line and Drain
For models with a direct water line hookup, connect a dedicated shutoff valve and appropriately sized tubing, checking the connection for leaks before pushing the unit fully into its final position. If your model instead uses a manual-fill reservoir, no plumbing connection is needed, but you will need to refill the reservoir regularly rather than relying on an automatic line. Drainage works similarly: some freestanding models drain excess water automatically through a small hose that needs to run to a floor drain or a suitable collection point, while others rely on a removable drain tray at the base that must be emptied manually as it fills. Confirm which type your model uses before final placement, since it affects how much clearance you need underneath and behind the unit, and whether you will need to check the tray periodically as part of regular upkeep.
Leveling the Unit
Use a level across the top of the cabinet and adjust the front leveling feet as needed. An unlevel ice maker can cause the ice-making tray to fill unevenly, produce misshapen ice, or drain improperly, leading to water pooling inside the unit.
First-Run Purge
Before regular use, run the unit through one or two full ice-making cycles and discard the first batch of ice — this clears any manufacturing residue or standing water from the internal lines and mold, and it is a step manufacturers explicitly recommend for freestanding units.
When to Call an Experienced Technician
If your installation location does not have an existing water line or floor drain, or if you are unsure how to safely connect a compression fitting, an experienced independent technician can complete the hookup correctly and check for leaks before you rely on the unit daily.
It is worth planning the location with everyday use in mind, not just the installation steps themselves. A spot near the kitchen sink or wet bar makes both the water hookup and periodic drain-tray emptying far more convenient than a location on the far side of the room, and keeping clear access to the front panel matters if your model has a manually cleaned filter or a reset button that occasionally needs attention. A little extra thought about placement now saves repeated inconvenience for as long as you own the unit.
Keep the original manual and any first-run instructions from the manufacturer with your other appliance paperwork, since the recommended purge-cycle count and filter-replacement interval can vary slightly by exact model.
Our ice maker repair team also handles installation and water line hookups for freestanding Kenmore ice makers, backed by a 30-day labor warranty and genuine OEM-compatible parts. We are an independent service and not affiliated with Kenmore, Sears, or Transformco. See our guide to common Kenmore ice maker parts once your unit is running, browse supported models, or find service near you. For manufacturer specifications, visit kenmore.com. Ready for an installation visit? Schedule service today.