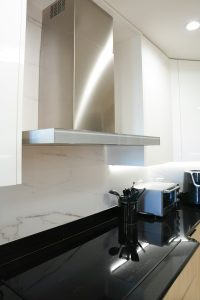

A proper Kenmore range hood installation depends on getting three things right before the unit ever goes on the wall: duct sizing, clearance above the cooking surface, and secure mounting to the wall or cabinet structure. Skipping any one of these steps is the single biggest reason a brand-new hood underperforms from day one, regardless of which OEM built it — Kenmore and Kenmore Elite range hoods are manufactured by Broan under the 233 model prefix, and Broan’s own installation specifications are what govern duct diameter and clearance for these units.
Duct Sizing
Undersized ducting is the most common installation mistake we see. A duct that is too narrow for the hood’s rated airflow forces the fan motor to work harder than it should, which shortens motor life and reduces the actual air movement out of the kitchen no matter how high the fan speed is set. Round duct is generally more efficient than rectangular duct of the same nominal size, and every 90-degree turn in the run reduces effective airflow, so the straightest, shortest path to the exterior termination performs best.
Clearance Above the Cooking Surface
Mounting height above the cooktop or range matters for both safety and performance. Too low, and the hood becomes a burn or fire hazard and can trap excess heat against cookware; too high, and it loses much of its ability to capture rising grease and steam before they spread into the kitchen. The hood’s installation instructions specify the manufacturer-recommended range for your exact model, and that range should be treated as a firm guideline rather than a suggestion.
Mounting and Structural Support
Range hoods are heavier than they look once ductwork, housing, and any cabinet enclosure are accounted for, and they need to be anchored into wall studs or cabinet framing rather than drywall alone. A hood that is not solidly mounted can vibrate loose over time, straining wiring connections and duct joints at the transition collar. This is one of the areas where a rushed DIY installation tends to cause problems months down the road rather than immediately.
Electrical Connection
Most Kenmore range hoods are hardwired rather than plug-in, and the circuit needs to match the unit’s electrical rating. Improper wiring at this stage is a common cause of the fan issues we cover in our guide on a Kenmore range hood fan not working, since a poor connection can intermittently starve the motor of proper voltage.
Cabinet Enclosures and Trim Kits
Many Kenmore range hood installations sit inside a custom cabinet enclosure or use a manufacturer trim kit to close the gap to surrounding cabinetry. These enclosures need their own ventilation clearance around the motor housing so heat generated by the fan motor can dissipate properly, and a tightly sealed enclosure with no airflow around the housing itself can shorten motor life even when the exterior duct is sized correctly. It is easy to focus only on the exhaust path and overlook this detail during a cabinet-integrated install.
Getting It Installed Correctly
Because duct sizing, clearance, and mounting all interact with each other, a hood that looks installed correctly can still underperform if any one specification was missed. Our experienced independent technicians install and reinstall Kenmore range hoods to the manufacturer’s duct, clearance, and electrical specifications, using genuine OEM mounting hardware, and every installation is backed by our 30-day labor warranty. If you already have a hood in place that is not venting well, check our Kenmore range hood not venting guide before assuming it needs to be reinstalled from scratch.
Schedule an installation or reinstallation and our team will confirm duct sizing, clearance, and mounting are all correct for your model, backed by a 30-day labor warranty. For manufacturer specification sheets, visit kenmore.com. See our full range hood service or find a location near you.