A correct Kenmore dryer installation prevents more service calls down the road than almost any other single step in the appliance’s life, and it comes down to three fundamentals: venting, clearance, and the right electrical or gas hookup. Kenmore dryers are built by several different outside manufacturers depending on the model prefix — Whirlpool for the 110 prefix, LG for the 796 prefix, Amana for prefixes like 174 and 335 — and while installation basics are broadly similar across them, the exact hookup requirements should always be confirmed against your specific model’s installation instructions.
Reading Your Model’s Installation Instructions First
Every Kenmore dryer ships with, or has available online, an installation instruction sheet specific to its exact model, and these specifications can vary meaningfully even between two dryers that look nearly identical from the outside. Skimming the general guidance below is a good starting point, but the manufacturer’s specific sheet for your model should always be the final word on duct diameter, maximum duct length, and clearance dimensions.
Venting Requirements
Every standard Kenmore dryer needs a dedicated exhaust duct running to the outside of the home, and rigid or semi-rigid metal duct performs significantly better than flexible foil or plastic duct, which sags, traps lint, and restricts airflow more over time. The duct run should be as short and straight as possible, since every foot of length and every 90-degree turn reduces the dryer’s effective airflow. A duct run that is too long or has too many turns for the dryer’s rated capacity is one of the most common root causes behind the problems covered in our Kenmore dryer multiple cycles guide.
Clearance Space
Dryers need clearance behind and beside the unit for the duct connection to seat properly without kinking, and gas dryers specifically need adequate clearance for combustion air and safe operation of the burner assembly. Pushing a dryer flush against a wall to save space is one of the fastest ways to crush the flexible duct connector and choke airflow before the dryer has even run its first cycle.
Gas vs. Electric Hookup
Electric Kenmore dryers need a dedicated 240-volt circuit matched to the dryer’s amperage rating, while gas models need both a proper gas line connection with a shutoff valve and a 120-volt electrical connection to run the drum motor, controls, and igniter. Mixing up connector types, using an incompatible power cord, or failing to properly bond a gas line are common DIY installation mistakes that can cause anything from a dryer that will not start to a genuine safety hazard.
Stacking and Alcove Installations
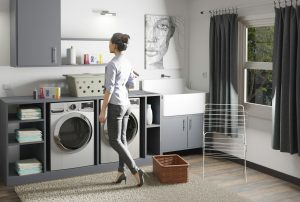
Dryers installed in a closet alcove or stacked above a matching washer have additional requirements, since enclosed spaces need proper make-up air and a stacking kit rated for the specific dryer model rather than a generic bracket. An enclosed alcove with a solid door and no ventilation louvers can starve the dryer of the combustion air a gas model needs, or simply trap heat around an electric model in a way that shortens component life over time.
Confirming Your Model’s Requirements
Because Kenmore dryers are built by different OEMs across the model range, it is worth confirming your dryer’s prefix and exact specifications before installation day — see our model number decoder guide for how to read the tag and identify the builder behind your unit.
Professional Installation
A dryer that is vented, cleared, and hooked up correctly from day one avoids the majority of airflow and heating complaints we see months or years later. Our experienced independent technicians install and reinstall Kenmore dryers to the correct venting, clearance, and electrical or gas specifications for your specific model, using genuine OEM connectors and hardware, with every installation backed by our 30-day labor warranty.
Schedule an installation and we will confirm venting, clearance, and hookup are correct for your model, backed by a 30-day labor warranty. For manufacturer installation specifications, visit kenmore.com. See our full dryer repair service or find a location near you.